VATL courses
Badges
The first step in setting up a badge in Moodle is to create the badge itself. You'll need an image (.gif, .jpg or .png) that is 100 x 100 pixels in size. I like using Piktochart to create badges.
Once you have a badge ready to go, follow these steps:
 Open the course admin gear and click on More….
Under Badges, choose Add a new badge.
In the Badge details page, enter a name and description for the badge for your reference, then upload a file – 100 x 100 pixels – in the image file picker.
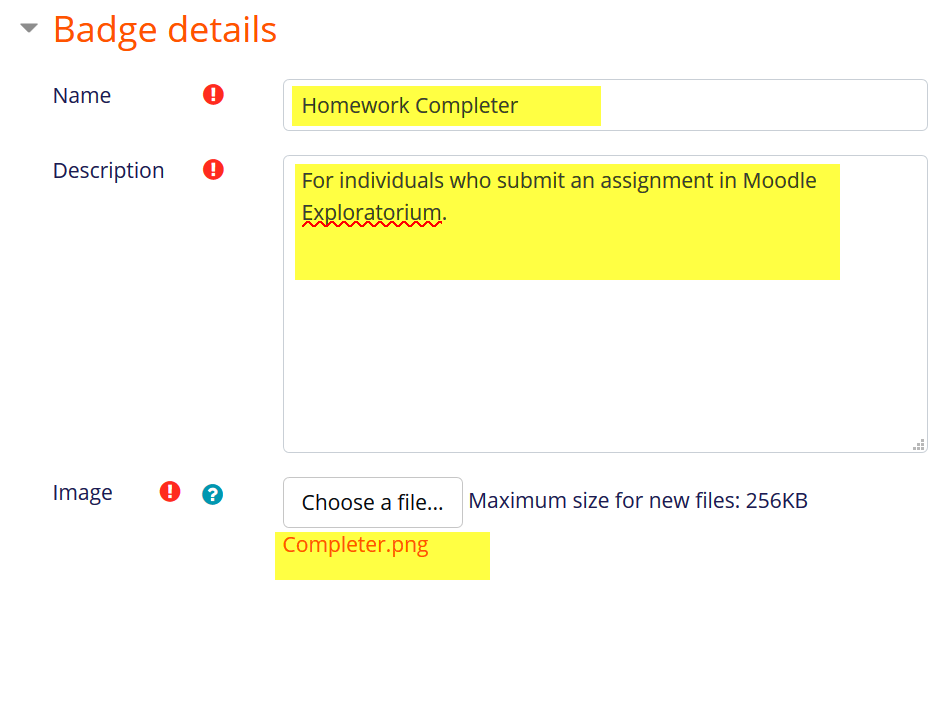
Update issuer information, if needed, then click on create badge.
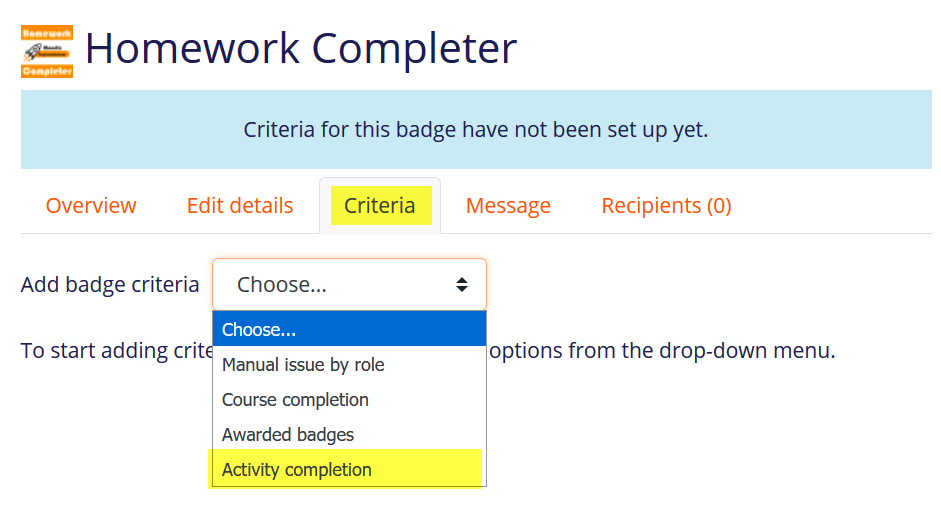
Select the type of criteria for earning the badge, in this case Activity completion, and press Enter.
Note: Be sure that the activity settings include the completion settings that you plan to reward—when I created this badge to reward completion of homework activities, I did not check the settings. The assignments that I selected were set to be marked as complete if a learner viewed them, NOT if they actually submitted their homework. So, most of those who earned the badge hadn't actually accomplished the task I planned for them to achieve. OOPS!
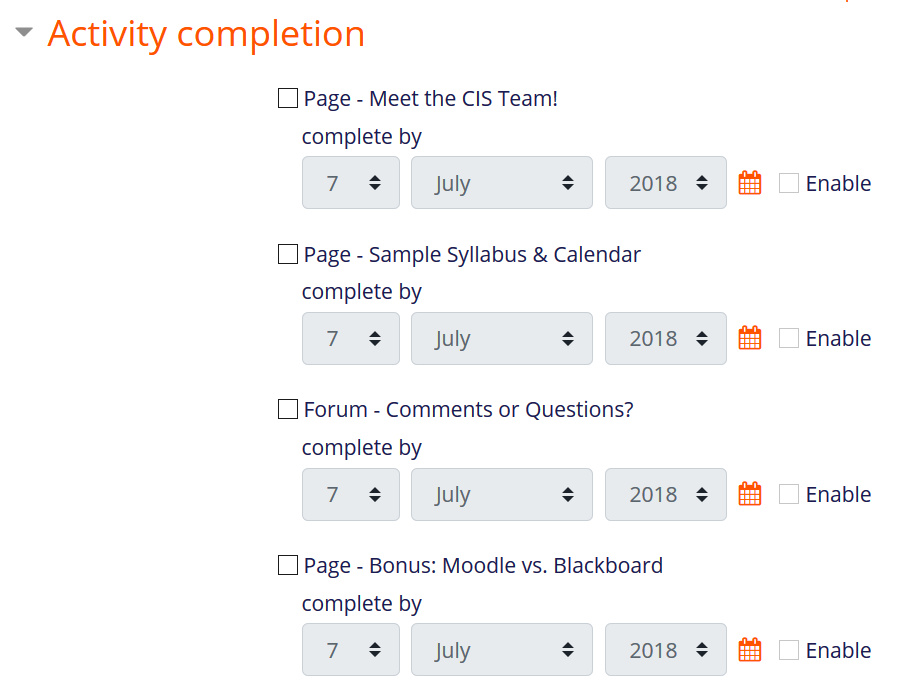
A list of activities that have completion settings enabled will be displayed. Choose the activities that you want to reward.
TIP: Before you take this step, review the items that you intend to include and verify that completion means what you think it means!
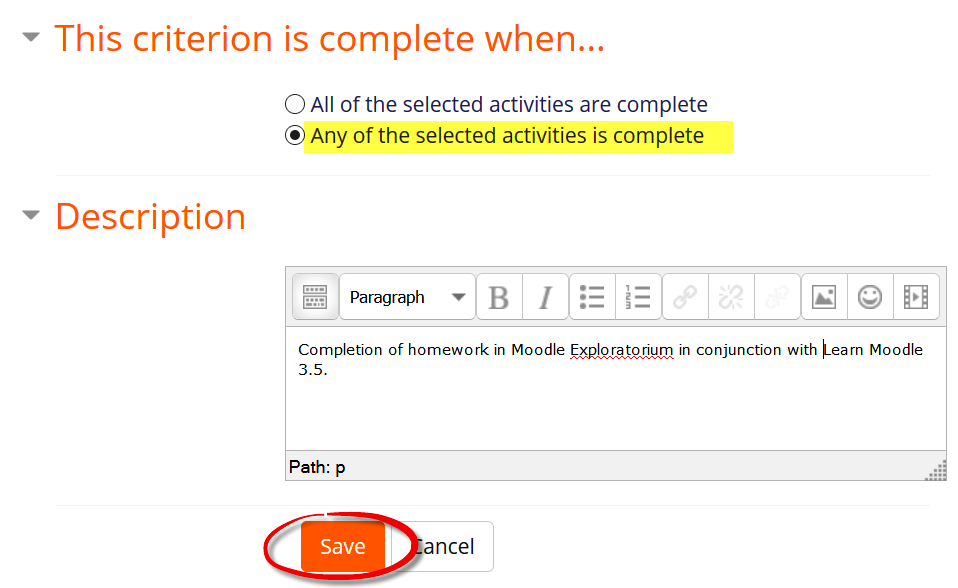
Then indicate if all or some of the activities must be completed to earn the badge. Add a description of the badge which will appear with the badge. Save.
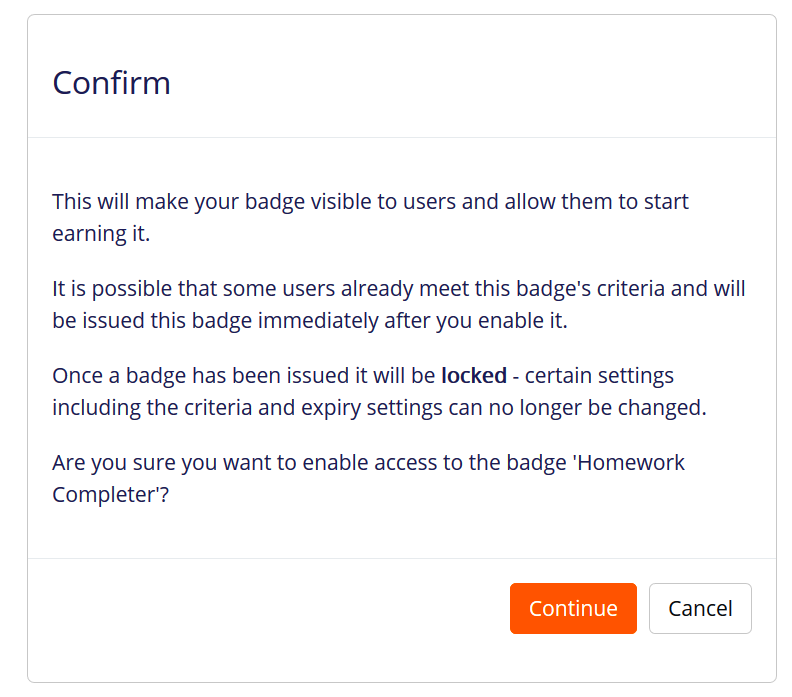
Verify that the badge settings meet your needs and click on Enable access. Note that you can edit or delete the settings you have made so far.

Click on Continue to confirm awarding of the badge.
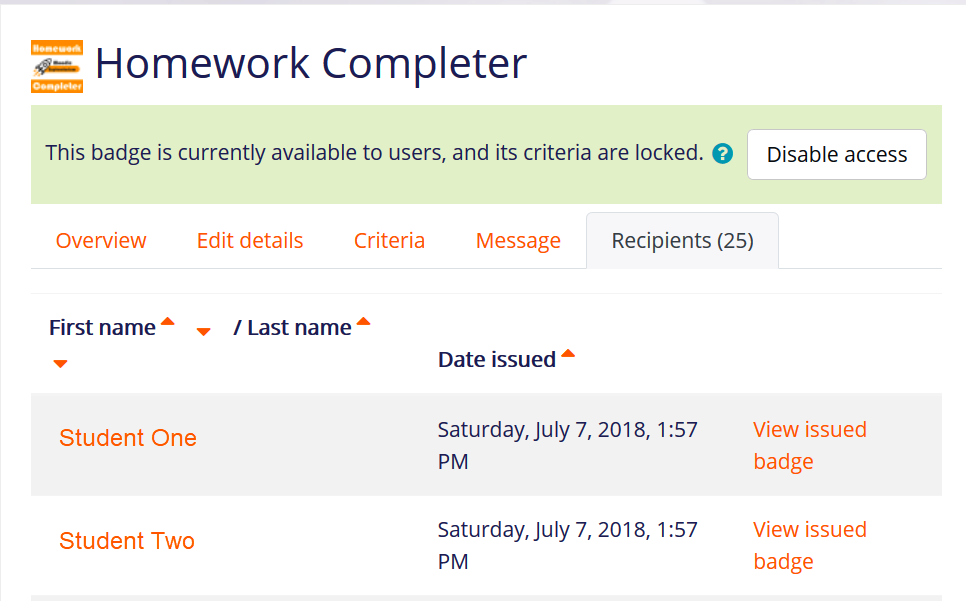
Those who have already earned the badge (if any) will be displayed on the recipients tab. Click on the Recipients tab to see who has earned the badge.
Have fun!
Course categories
A - member of VATL
can build your own course.

Virtual Academy of Teaching and Learning
Contact
E-mail: vatl@ysu.am
Phone: (+374 10) 57 06 77